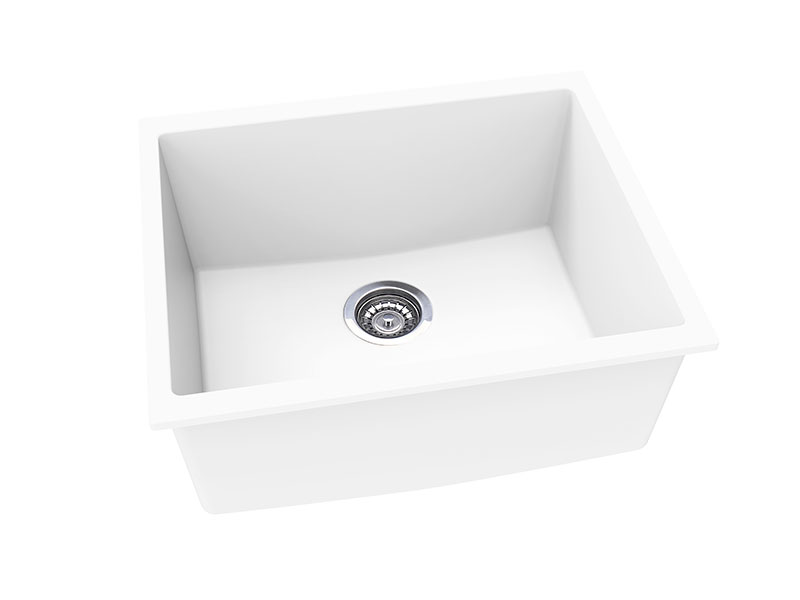
An Undermount Sink can make a kitchen look cleaner, more modern, and easier to maintain. Because the sink is fixed below the countertop, there is no raised rim around the edge, so crumbs and water can be wiped straight into the bowl. That simple detail is one of the main reasons many homeowners, fabricators, and project buyers prefer this style.
Before any adhesive or clip is prepared, the sink size must match the cabinet and countertop layout. This is the first point that should never be rushed. An undermount sink needs enough cabinet width for the bowl itself, the mounting area, and the space required for plumbing fittings below. If the cabinet is too narrow, installation becomes awkward and future maintenance becomes harder.
It is also important to confirm the cutout size. The sink and the countertop opening must work together as one system. If the opening is too large, the visible edge may look rough and unsupported. If it is too small, the bowl opening will be reduced, which affects both function and appearance. A composite undermount sink is often chosen because it offers a neat, solid look, but that effect only appears when the opening is sized and positioned correctly.
Depth should also be considered early. A deeper single bowl sink is practical for washing pots, trays, and larger cookware, but it also changes the working height and the available room for waste fittings underneath. This is especially important in compact kitchens where under-sink storage is limited.
A clean and stable countertop underside is essential for a secure undermount installation. Whether the top is quartz, granite, or another solid surface, the mounting area must be dry, dust-free, and smooth enough for sealant and hardware to hold properly. Leftover cutting dust, oil, or moisture can weaken adhesion and reduce long-term stability.
At this stage, the installer should dry-fit the sink first. This means lifting the bowl into position without final bonding, just to confirm alignment and edge exposure. This step helps catch small problems before they become expensive ones. The sink should sit centered under the opening, and the front-to-back position should feel balanced with the cabinet and faucet layout.
A dry fit also makes it easier to decide the reveal style. Some projects use a flush look, while others prefer a slight negative or positive reveal. In practical kitchen use, the cleanest result usually comes from a consistent edge that allows easy wiping and does not expose too much of the cut countertop.
One common mistake is relying on adhesive alone. An undermount sink should always be mechanically supported during fitting and in long-term use. Sealant helps create a water-tight joint, but it is not meant to carry the full working load of the sink, especially when the bowl is filled with water or heavy cookware.
Temporary support can be created during installation with braces, adjustable bars, or a support frame beneath the bowl. Once the sink is exactly where it should be, the permanent fixing method can be completed with mounting clips, rails, or a reinforced support structure depending on the countertop and jobsite conditions.
This matters even more with composite sinks. A quartz composite undermount sink offers durability and a refined appearance, but proper support still determines whether the installation remains stable after years of daily use. A well-supported sink feels solid from the first day and helps protect the countertop joint from stress.
After the sink has been test-fitted and support is in place, the sealant can be applied. The bead should be continuous, even, and placed where it will create full contact between the sink rim and the underside of the countertop. Too little sealant may leave gaps. Too much can create messy squeeze-out and more cleanup work than necessary.
The sink should then be lifted into final position carefully and without twisting. Once it is seated, alignment needs to be checked again from multiple angles. It is much easier to correct a slight shift immediately than after the fixing hardware has been tightened. The edge should appear even all around the opening, and the bowl should sit square with the cabinet front.
Excess sealant should be cleaned before it fully cures. A neat underside finish may not always be visible to the end user, but it reflects installation quality and helps future servicing.
When the sink is in the right position, the mounting hardware should be tightened gradually rather than all at once. Working in stages helps keep the bowl level and prevents one side from pulling harder than the other. Uneven tightening can shift the sink off center or affect the final reveal.
This stage is about control, not force. Over-tightening may stress the fixing points or squeeze out too much sealant from the joint. The goal is firm, even contact across the full mounting edge. Once the sink is secure, leave the assembly undisturbed for the sealant to cure fully according to the installation material being used.
Patience here protects the entire job. Moving too fast to connect plumbing or test the sink before proper curing can weaken the bond and create avoidable problems later.
After curing, the waste fitting, trap, and water connections can be completed. This is the point where the installation becomes a working kitchen component rather than just a mounted bowl. The drain should sit correctly, the pipework should not place pressure on the sink outlet, and all connections should be checked for leaks.
A simple water test is essential. Fill the bowl, release the water, and inspect both the drain connection and the sink-to-countertop joint. The installer should also check whether water flows naturally toward the outlet and whether the bowl sits level in actual use. Small alignment problems often show up clearly during this stage.
Because Undermount sinks are often selected for easy cleaning and visual simplicity, the finished result should be judged not only by whether it holds water, but also by how cleanly it integrates with the countertop. The edge should look smooth, the bowl should feel solid, and daily wiping should be easy and natural.
Most undermount sink issues come from a few repeated causes. Poor measurement often leads to an awkward reveal. Weak support can cause long-term sagging. Incomplete sealing may allow moisture to work into the joint area. Rushed curing can reduce the bond before the sink is even fully in service.
These problems are usually preventable when the fitting process is treated as a precise installation job rather than a quick assembly step. Good preparation, accurate positioning, proper support, and careful final inspection do more for long-term performance than any attempt to fix mistakes later.
For projects using quartz composite sinks, the fitting standard should match the visual quality of the product itself. The bowl may have the right color, texture, and dimensions, but the final user experience still depends on how well it is installed.
Knowing how to fit undermount sink units correctly is the key to getting both appearance and durability right. A clean cutout, accurate dry fit, reliable support system, even sealant line, and careful final testing all work together to create a sink installation that looks refined and performs well in daily use.
If you are selecting an undermount sink for a new kitchen project or need guidance on sink size, cutout details, or installation matching, feel free to contact Quartzstarsink. Our team can help you review the product setup and provide practical support for choosing the right sink solution for your application.
Previous: How To Clean Kitchen Sink

 Mobile Phone:
 Contact Now